Create a New Video Project
Step-by-step guide to creating and setting up a new video project in VEOGENT STUDIO
Creating a new video project is the first step in your journey with VEOGENT STUDIO. A well-defined project serves as the foundation for all subsequent content creation activities, including chapters, scenes, characters, and ultimately, the final video.
This guide will walk you through the process of creating a new video project in VEOGENT STUDIO, from accessing the dashboard to setting up project parameters and utilizing AI-powered description generation to enhance your project content.
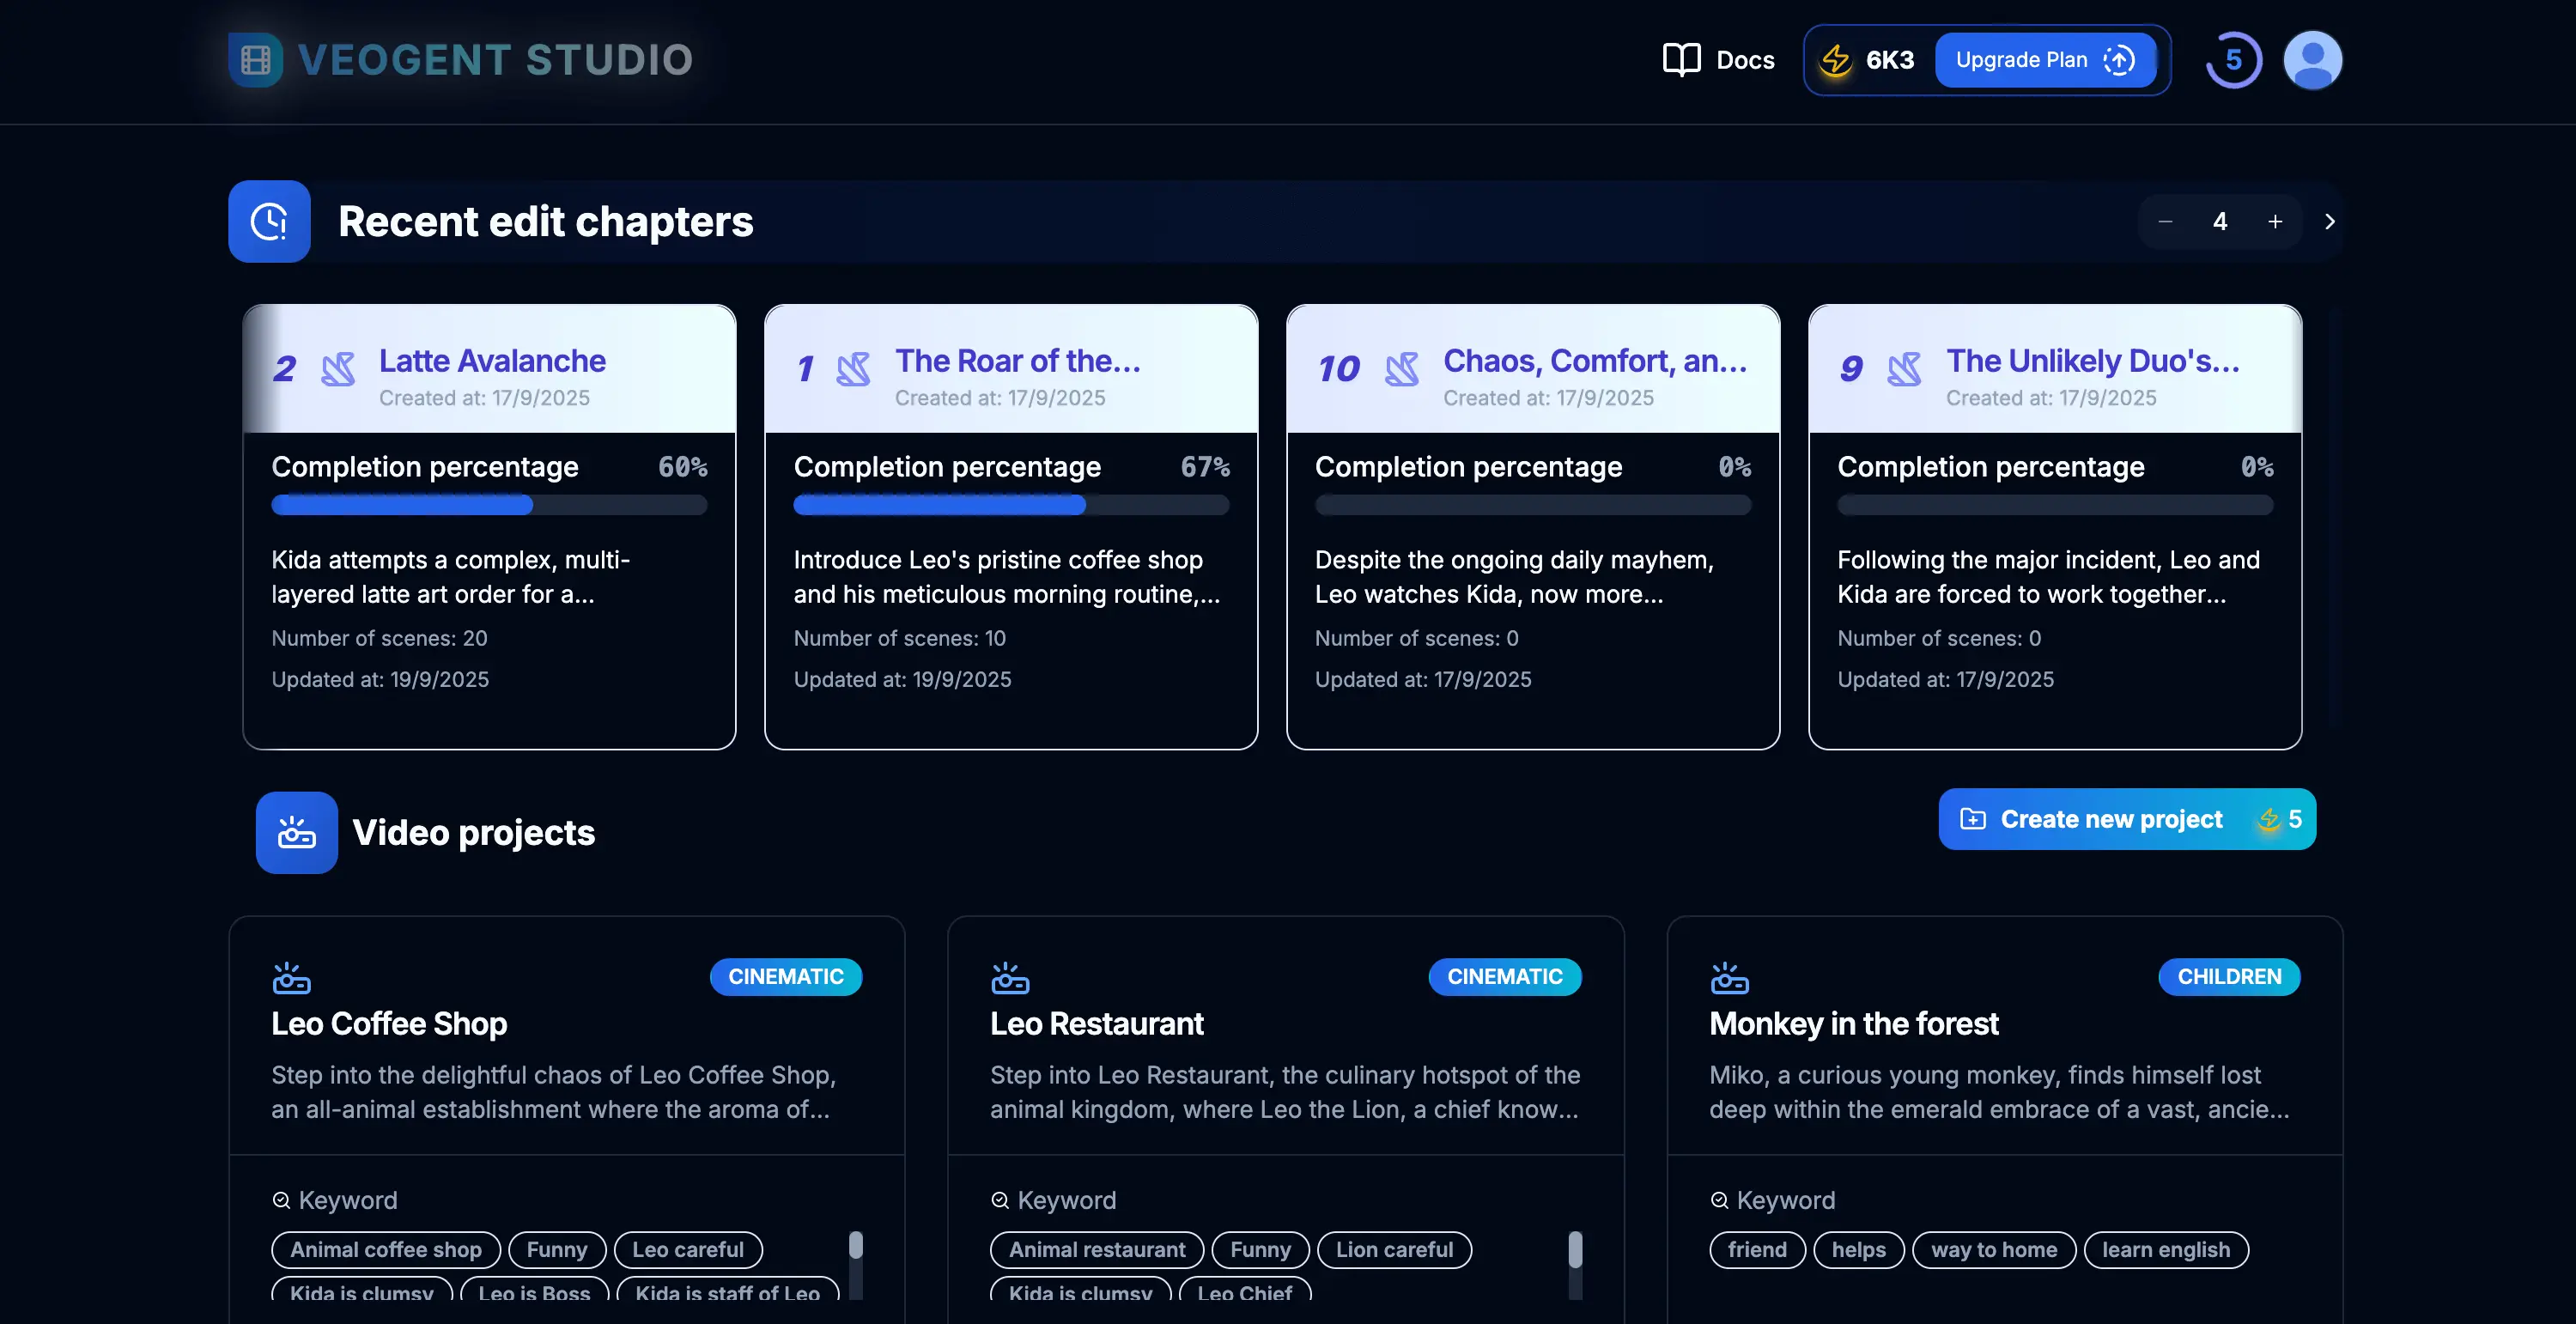
Figure 1.1: VEOGENT STUDIO Dashboard
Tips & Notes:
- Ensure that you have successfully logged in to access all features.
- Check your credit balance before starting a new project.

Figure 2.1: Project creation form
Figure 2.2: Filling in project details
Tips & Notes:
- Choose a clear, descriptive name that reflects the content of your video project.
- Keep your project organized by using consistent naming conventions.
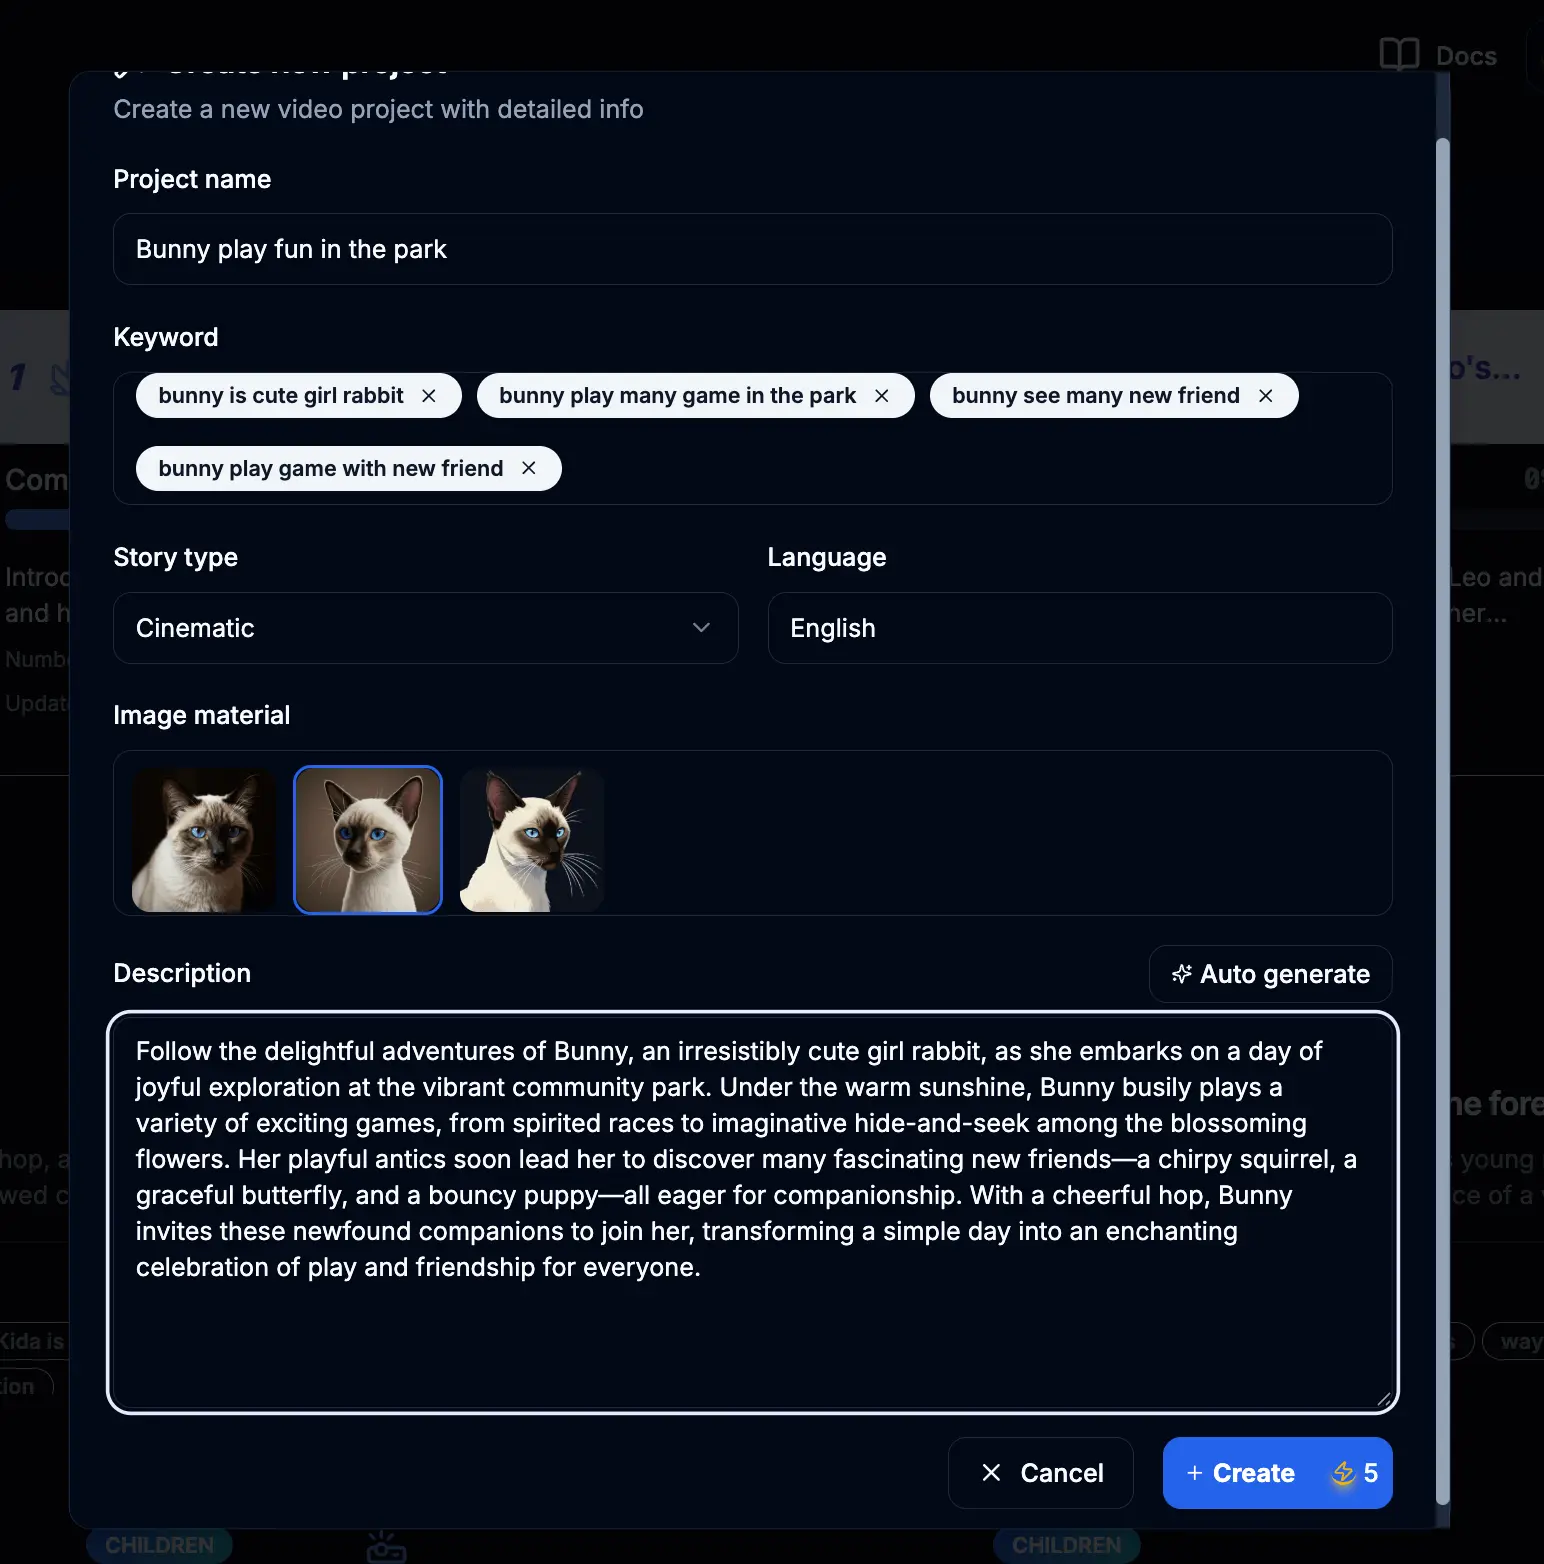
Figure 3.1: Create project description using AI
Figure 3.2: Entering keywords for project description
Tips & Notes:
- Add diverse keywords so AI can better understand your project and create relevant content.
- Keywords represent the main content that makes up the storyline for the video.
- You can manually input project descriptions from external sources if you prefer.
- The more specific your keywords, the more targeted your AI-generated description will be.
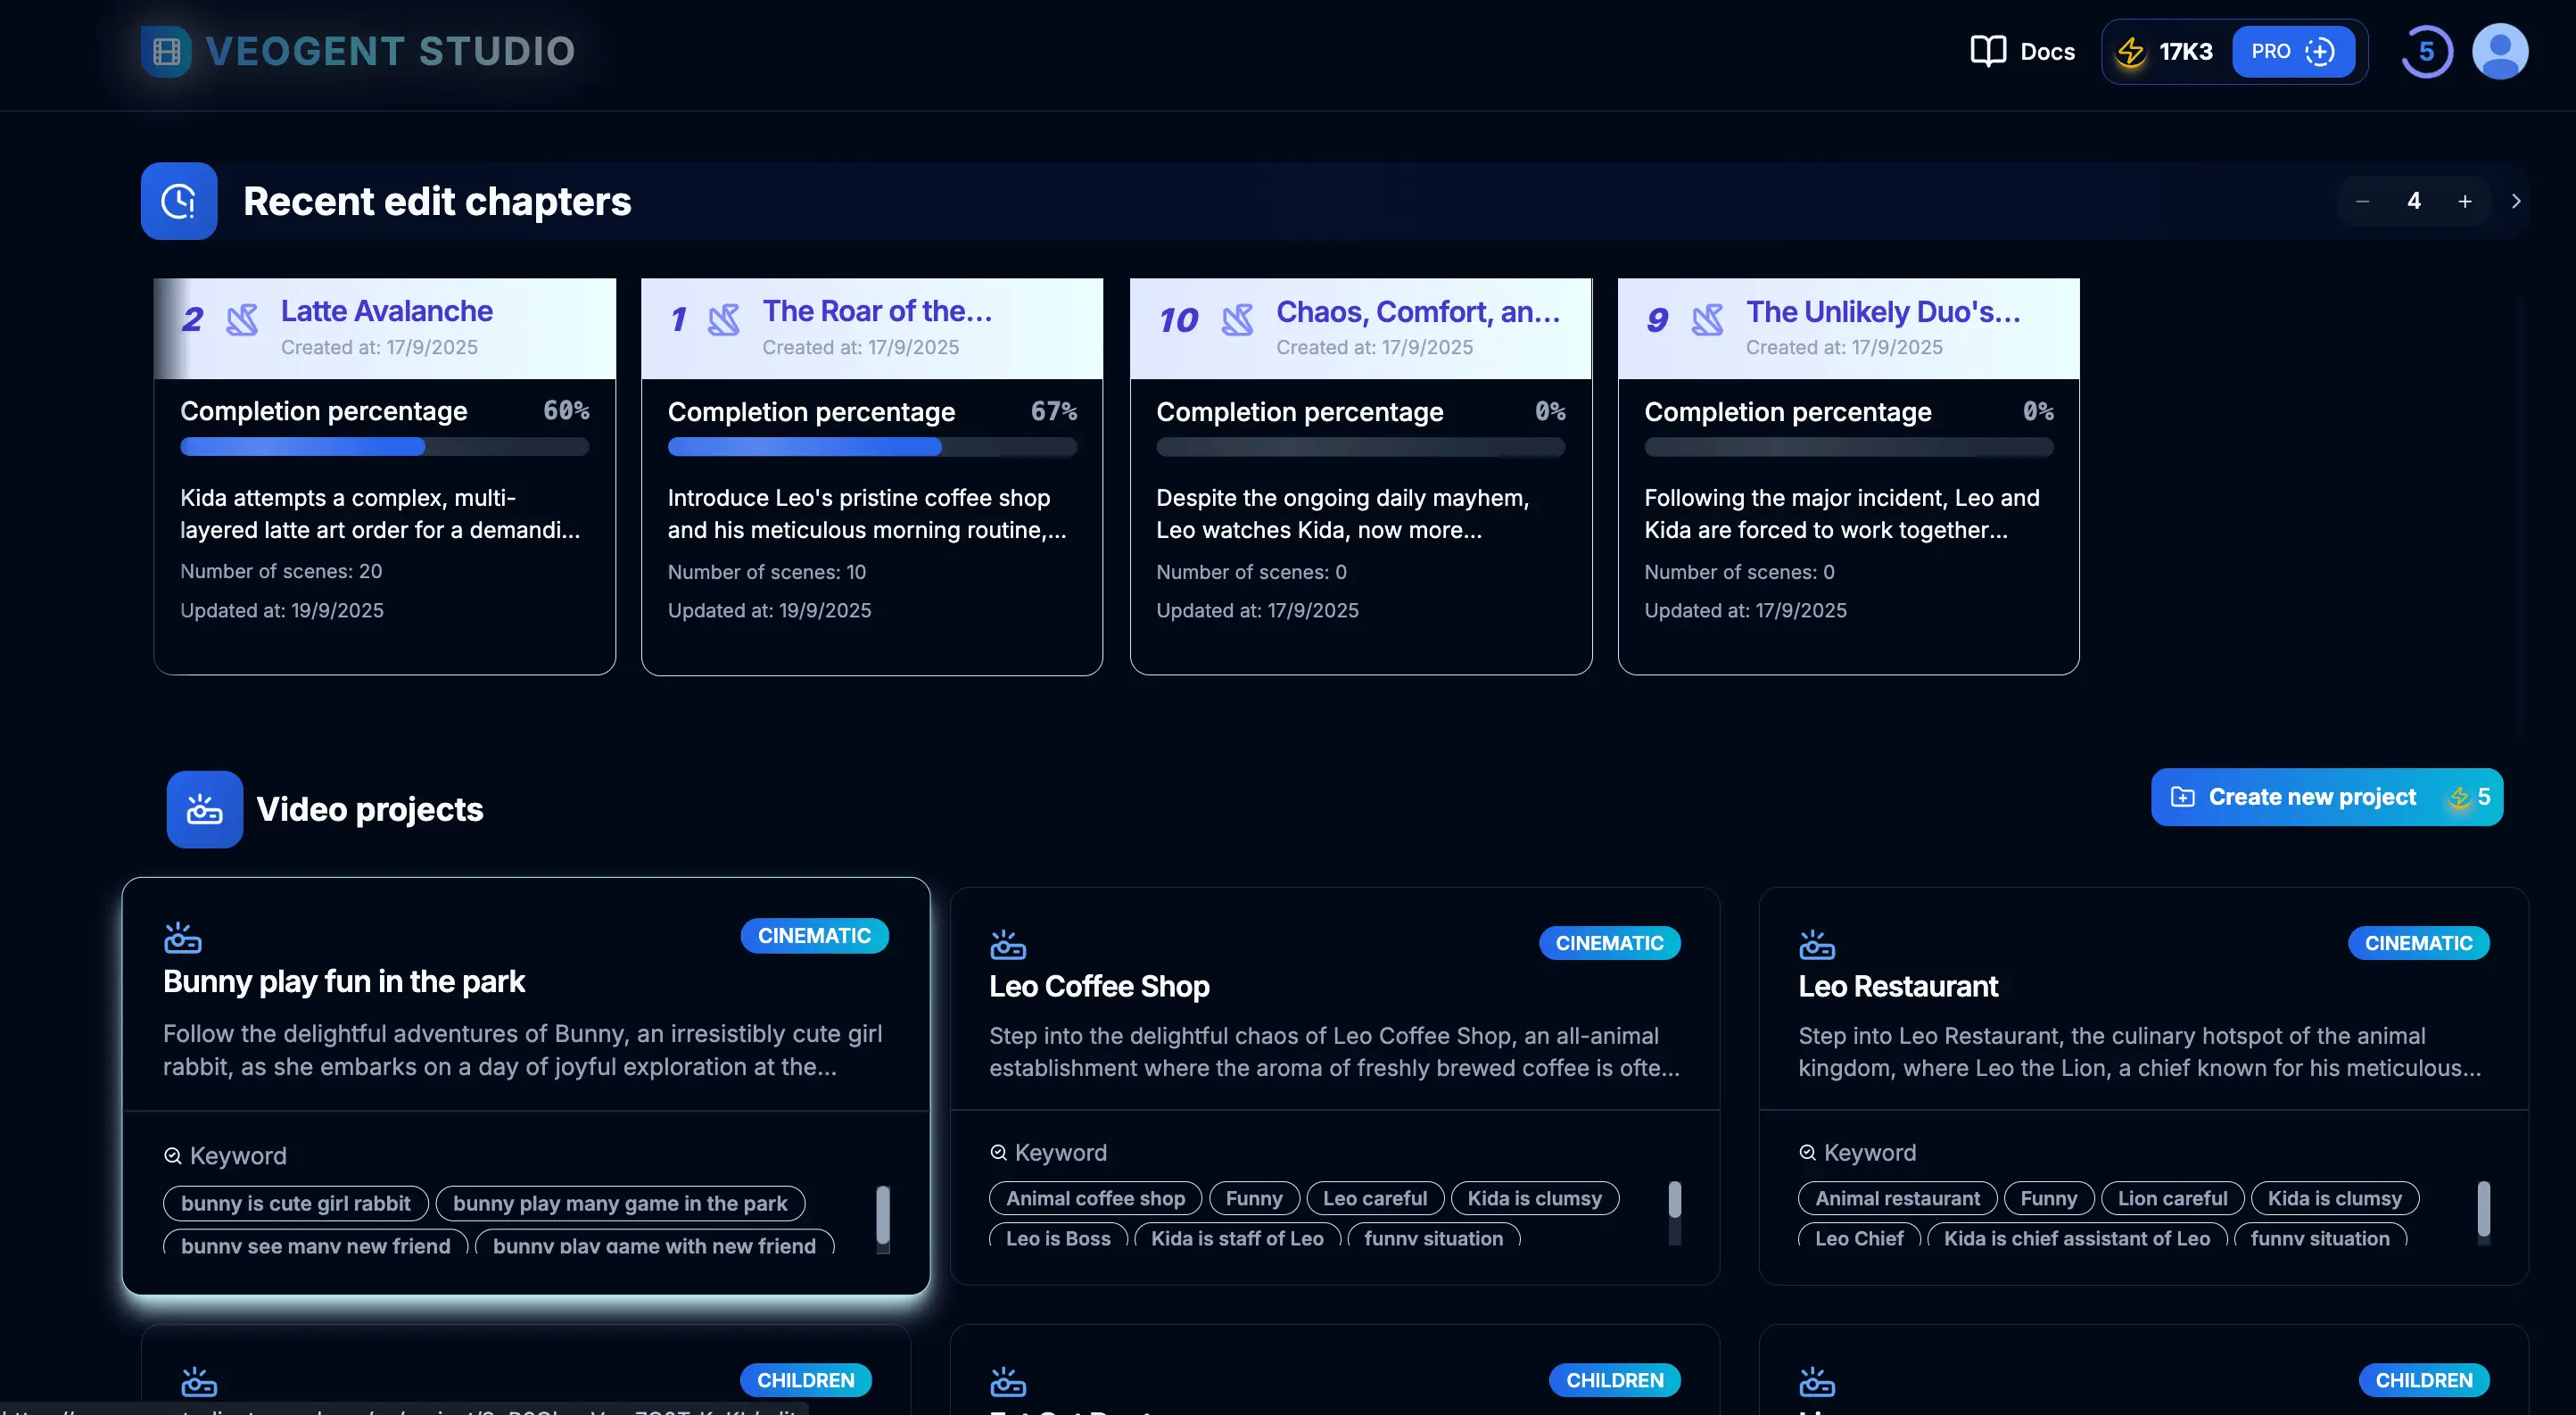
Figure 4.1: Project settings configuration
Tips & Notes:
- Consider your target audience when selecting video style and tone.
- Choose settings that align with your brand identity for consistency across videos.
Figure 5.1: Project list with newly created project
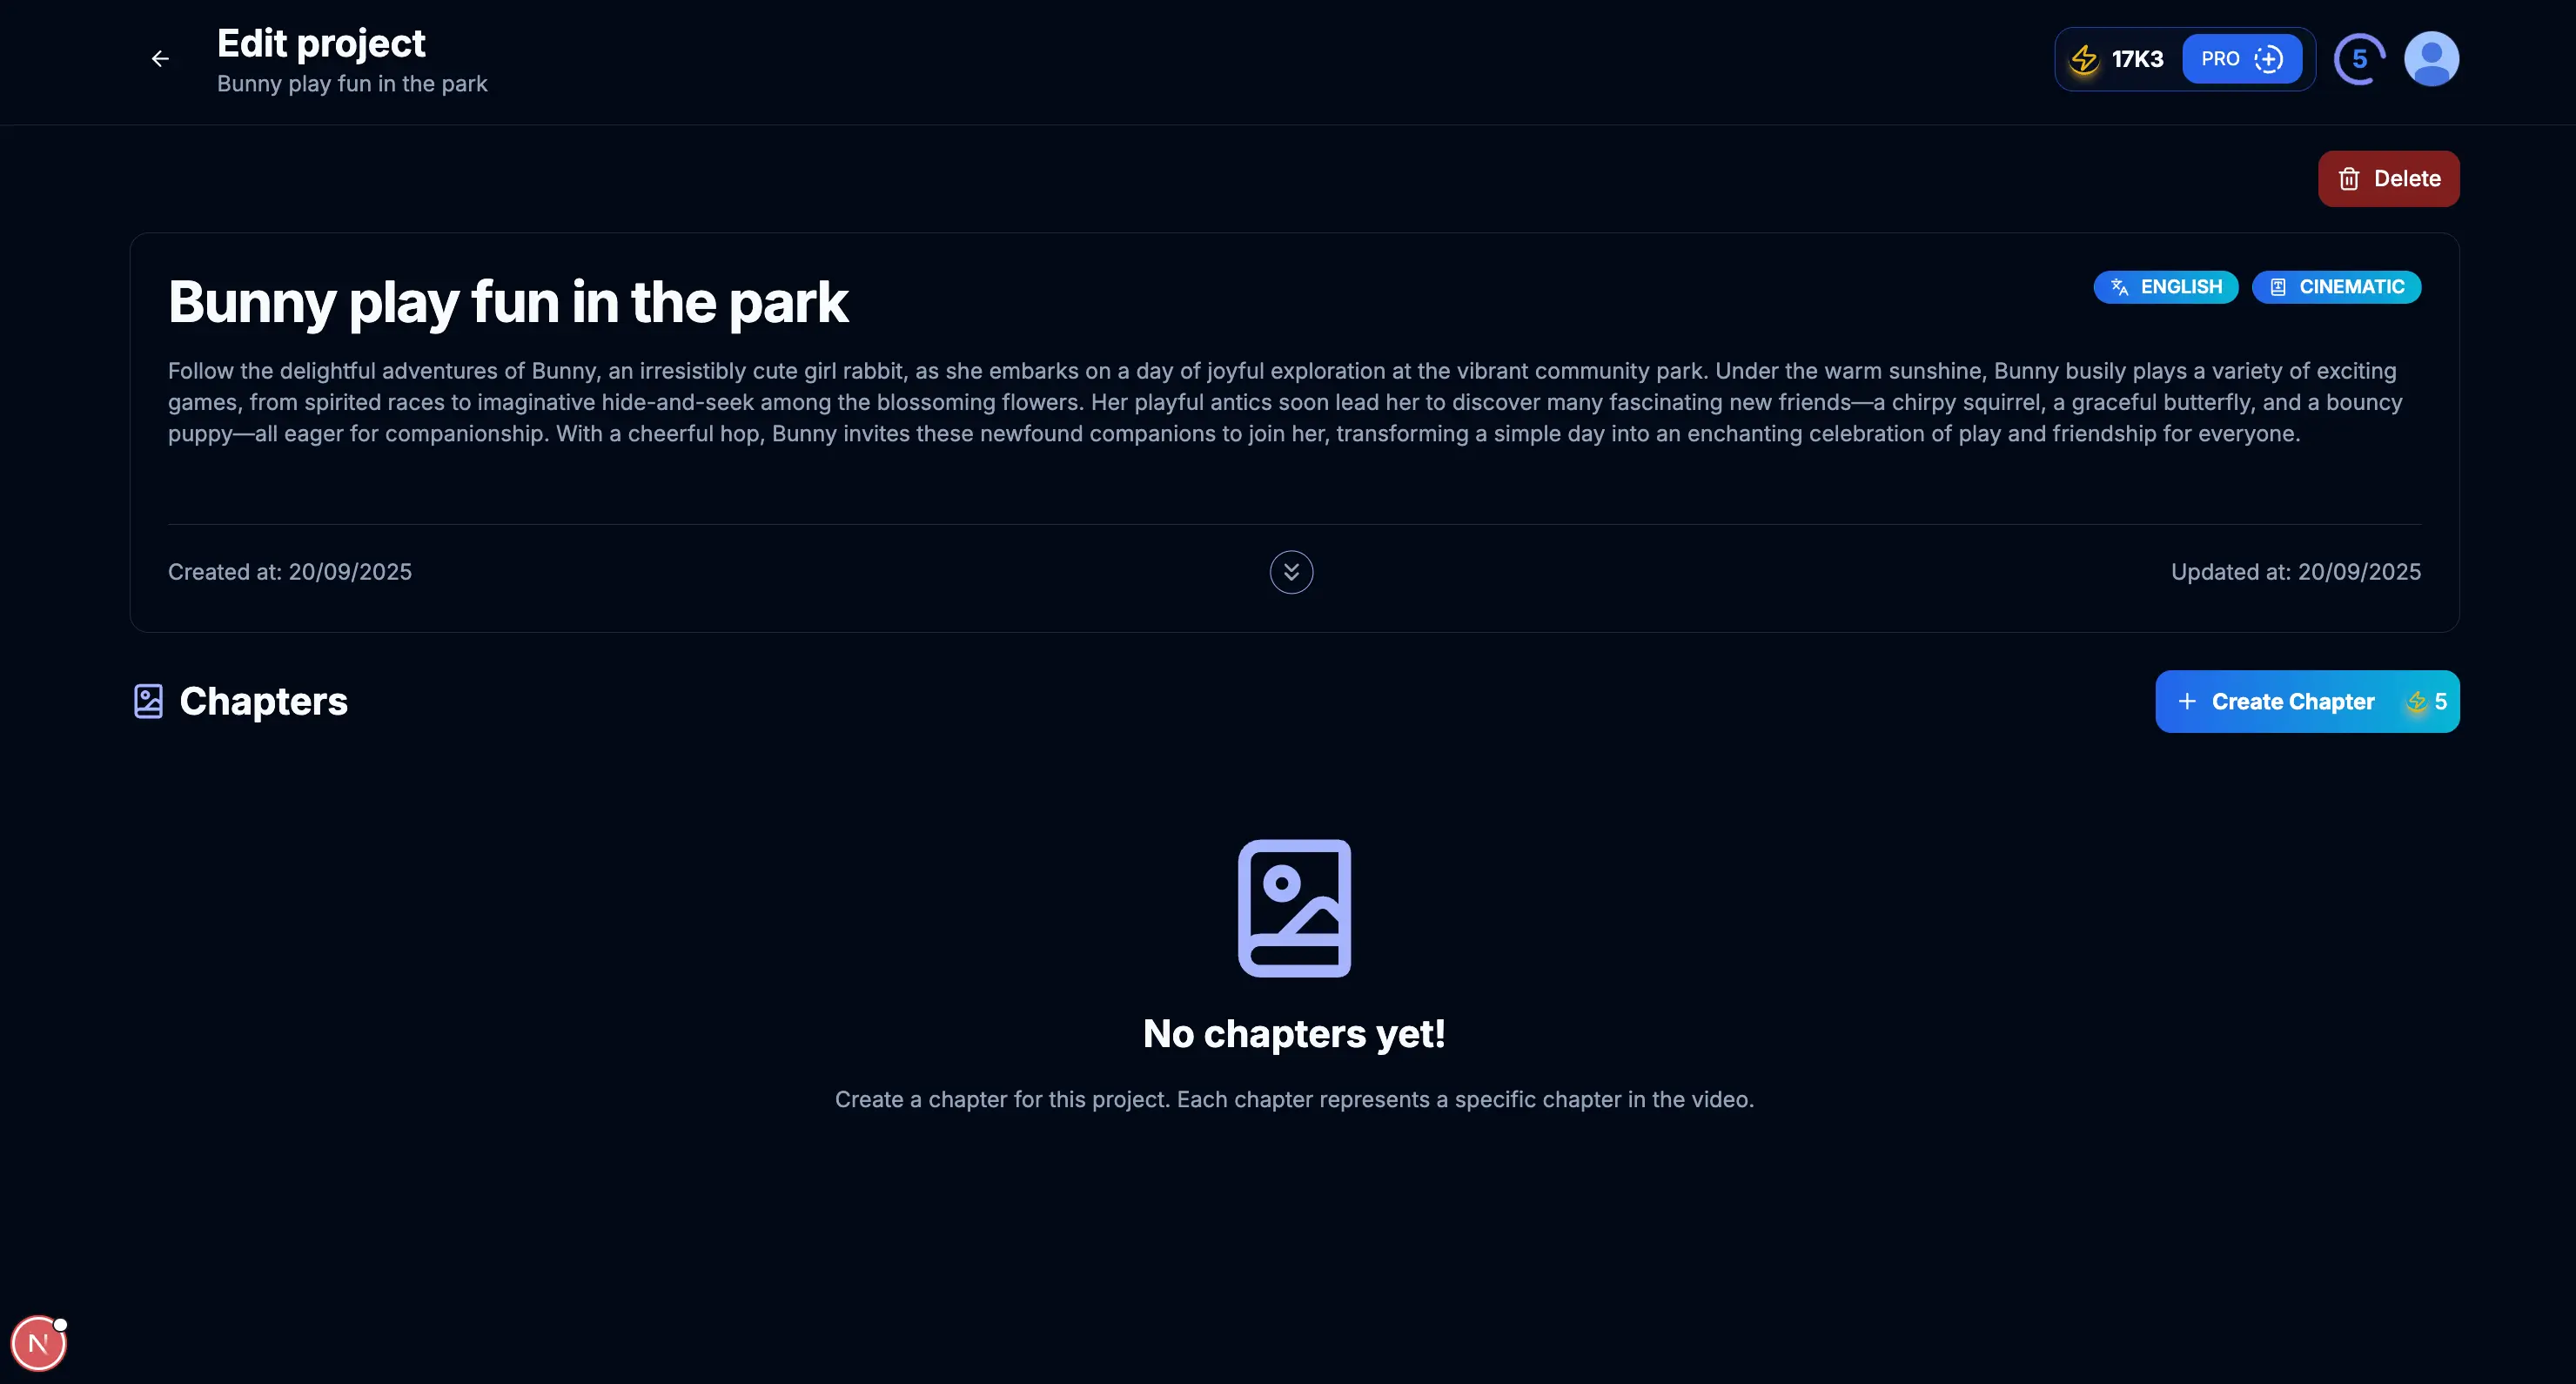
Figure 5.2: Project details page
Tips & Notes:
- Newly created projects will appear at the top of the list.
- Click on the project to continue your work and add more elements.
- You can use the search function to find specific projects if you have many.
- Project status indicators help you track progress at a glance.
Set up Flow Authorization Key
Learn how to set up and manage your Flow Authorization Keys
Create Chapters for Project
Learn how to create and organize chapters in your video project
Characters in Project
Learn how to create and manage characters in your videos
Create Consistent Character Videos
Step-by-step guide to creating consistent character videos
Creating a new video project in VEOGENT STUDIO is a straightforward process that sets the stage for your creative work. By following this guide, you've learned how to create a project, generate descriptive content with AI assistance, and configure settings to match your vision.
With your project now set up, you're ready to move on to the next steps: creating chapters, designing scenes, and developing characters to bring your video to life. Remember that a well-defined project will make these subsequent steps more efficient and cohesive.